With the debut of ChatGPT, there’s been an increasing interest in AI generating code. While many early claims were exaggerated for social media clout, there’s some decent proof that LLMs could generate useful code.
At Idea Maker, we’ve been using multiple AI models to tackle tedious jobs such as RegEX and SQL commands. However, we recently had a customer request us to build the backend of their website to complement their AI-generated frontend, and it sparked our interest. Will AI really be able to replace human programmers?
We decided to put it to the test. From the testing environment to our unbiased thoughts, we’re going to give our honest thoughts on will AI replace developers?
Let’s begin:
Table of Contents
The Testing Environment
We began this experiment with a simple test—trying to design the frontend of a previous project just using AI. In simple words, a frontend is basically what users see and interact with on their browser.
This proved to be a great benchmark and allowed us to compare our design with our client’s frontend. Plus, designing the frontend is much easier than the backend, since most of the work involves moving buttons around, changing colors or fonts, etc.
For our AI model, we picked Bolt.new because our client had used this same tool for other projects. But feel free to test whatever tool suits you best, such as Replit.ai, Cursor, etc.
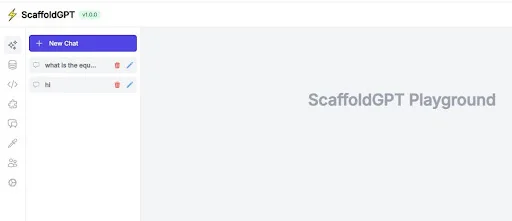
This is a screenshot of our existing project. It shows the dashboard of a chatbot with an input area and sidebar with multiple functions.
The sidebar tabs were as follows:
- Playground: Used to chat with the AI bot.
- Data Sources: Lets you inject additional data, such as PDFs or documents.
- Embed: Lists different ways to embed the chatbot into websites.
- Integrations: Contains various interfaces for the chatbot, such as WhatsApp, Slack etc.
- Conversations: Displays your complete chat history for analysis
- Appearance: Allows you to customize your chat widget
- Teams: Manage and invite users to the system
- Prompts: Select pre-built prompts to enhance functionality
Now that we had the basic setup, it was time to put things to the test. Our prompting challenge took around 2.5 hours. Even though it sounds like a lot, building the frontend using AI was much faster than creating it from scratch—nearly 10 times faster.
During the process, we also found a couple of interesting things that we’ve discussed in detail. Let’s take a look at the actual prompts we tested and what kind of progress we made below:
Prompt #1: Building The Basics
We started with the following prompts:
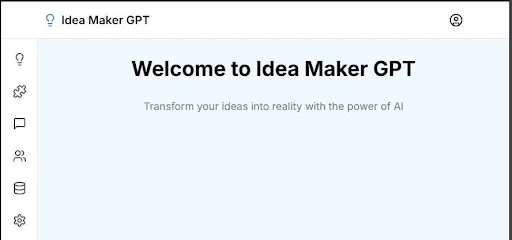
“Please create a NextJS app for me. The platform name is ScaffoldGPT. So, you must write that in the tab title and put the logo in the tab as well. Have a white horizontal nav bar. Place the logo in the left side of the nav bar. Next to the logo, write the name of the platform.”
“Use a lightbulb icon as the logo.”
“Make the background light blue.”
“When the profile icon is clicked a small menu will be shown. The menu contains:”
- Profile
- Sign out
Here’s what the chatbot produced after all of these prompts:
Prompt #2: Adding A Sidebar
This wasn’t a bad start. Next, we started building the sidebar:
“On the left side, there is a sidebar that contains icons, when you hover over the icons they will show the title. The titles are:”
- Playground
- Data Sources
- Embed
- Integrations
- Conversations
- Appearance
- Teams
- Prompts
So far so good! Here’s what it generated:
At this point, we ran into a small problem. Bolt alerted us that there might be some coding problem. Here’s the exact warning:
 ⚠ ./components/sidebar.tsx
Attempted import error: 'PuzzlePiece' is not exported from '__barrel_optimize__?names=Lightbulb,PuzzlePiece,MessageSquare,Users,Database,Settings!=!lucide-react' (imported as 'PuzzlePiece').

Import trace for requested module:
./components/sidebar.tsx

./components/sidebar.tsx
Attempted import error: 'PuzzlePiece' is not exported from '__barrel_optimize__?names=Lightbulb,PuzzlePiece,MessageSquare,Users,Database,Settings!=!lucide-react' (imported as 'PuzzlePiece').

Import trace for requested module:
./components/sidebar.tsx
To be honest, this was a bit intimidating. The tool does have an auto-correct button that says “Allow Bolt to attempt to fix?” Most users won’t really have other options, so we clicked “Yes.”
After it did some computing, Bolt successfully fixed the problem. It showed the following message:
- Changed PuzzlePiece to Puzzle in the import statement and the sidebar items array, as that’s the correct name for the icon in the lucide-react library.
We had one question after this encounter—if Bolt could fix this problem, why did it create it to begin with? The explanation is a bit technical, so we won’t be discussing it here. This error might worry the average user, but the good news is that it’s fixable.
Prompt #3: Creating A Chat History Tab
The next step was to create a chat history feature that would show inside the “Conversations” tab. Here’s our prompt:
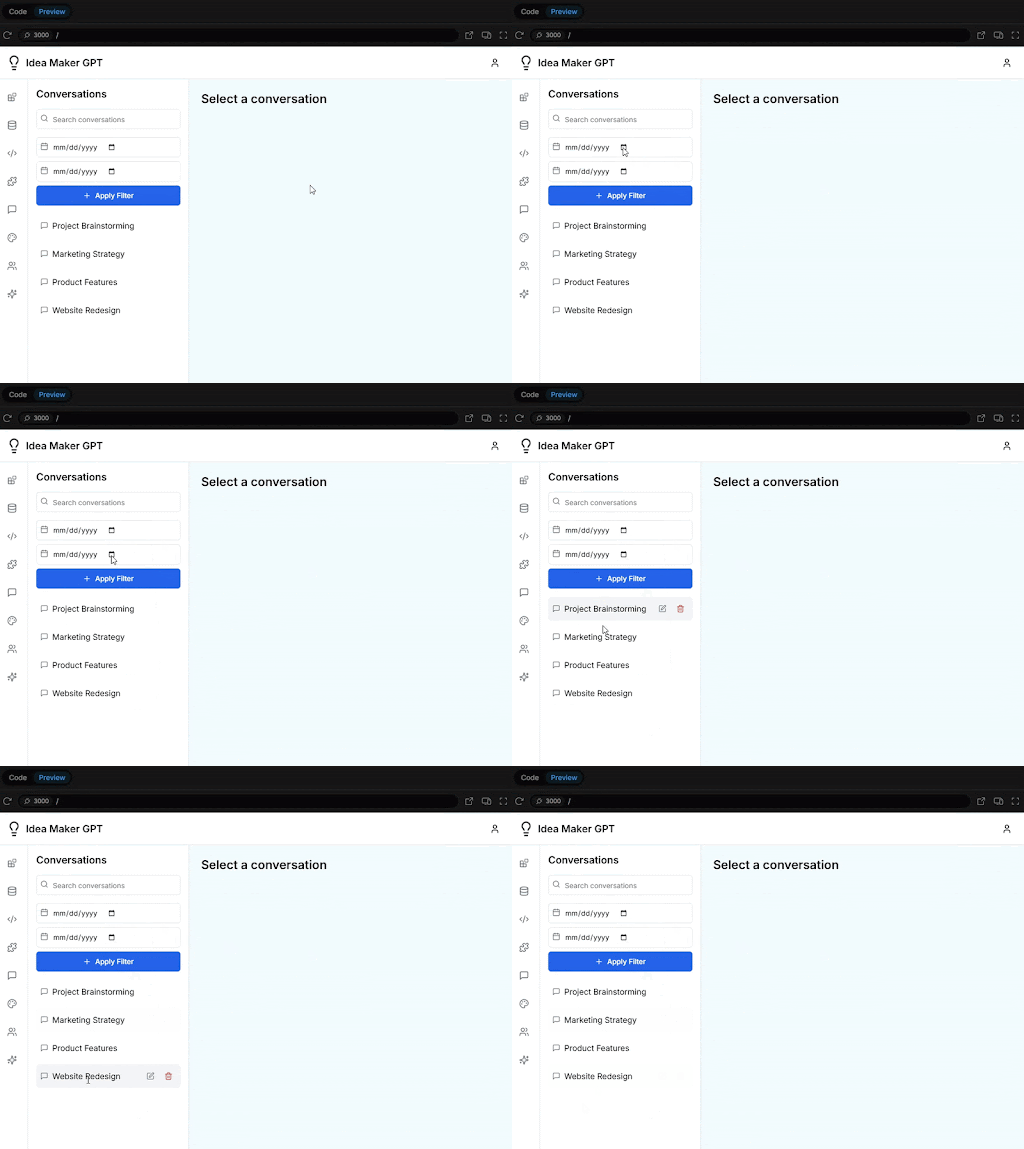
When clicking the “Conversations” icon, create another sidebar next to the main sidebar. This new sidebar will contain the list of chat history. This secondary sidebar will have the title “Conversations”. Underneath is a search text field with an icon of a magnifying glass. Below that will be a date field with the icon of a calendar. The help text inside this field will be “Date Before”. Below this date field is another data field with “Date After” and a calendar icon.
Below the Date fields are a button saying “Apply Filter”.
Each chat will have an icon of a message, and after the title have a delete icon with red color and an edit icon. The color of the button is Blue with a white color text. Add a + icon in the button before the text.
And here are the results:
The site is looking pretty good so far. To be honest, we were a bit impressed. It’s not visible here, but each button showed the correct titles upon hovering.
Prompt #4: Adding The Playground Feature
Next, we decided to add a Playground area in the frontend where users could chat with the AI bot.
Here’s our prompt:
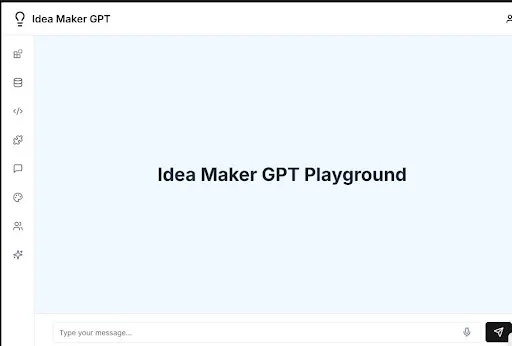
The space next to the second nav bar will be changed when the menu item “Playground” is clicked. Have a text input at the bottom of the page. Inside the text field, have a placeholder that says “Type your message …”. Put a voice input icon on the right side of the field, which is clickable. Next to the text input, have a button with the send icon. Change the text in the middle of the page to Idea Maker GPT Playground.
Here are the results:
The site is really starting to come together now. You can see how simple it was to build and add different views to the site. However, we got another alert at this point.
Bolt notified us that clicking on some of the tabs results in missing pages as we never created those. So, we clicked on the “Have Bolt Attempt to Fix”. Bolt went ahead and built us some dummy pages for all the other views.
Prompt #5: Adding Integrations
Next, we decided to add some integrations to our frontend.
Here are the prompts we used:
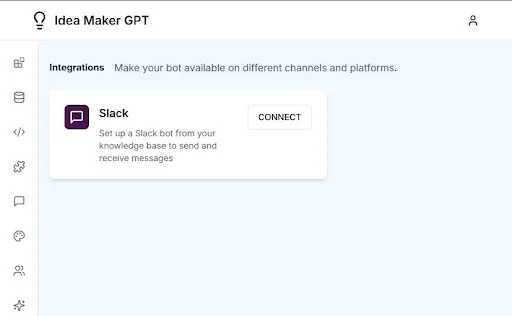
When ‘integrations’ is clicked, you will keep the horizontal nav bar and the first sidebar. On the other space, you will put the following content:
- Write the title Integrations in bold and a font size of 15. Next to the title, Write ‘Make your bot available on different channels and platforms.’
- Have a card that contains a slack logo on the left side of the card, and on the right side, have a CONNECT Button. Below the slack logo, write the name Slack.
- Inside the card below the name Slack, write the following text “Set up a Slack bot from your knowledge base to send and receive messages.”
- The card is clickable.
- The card float to the left.
And here are the results:
No problems here. Now, we’re getting to the final screens.
Prompt #6: Final Touches
This next screen is a bit complicated, so prompting took longer and required some adjustments.
Here are the commands we used:
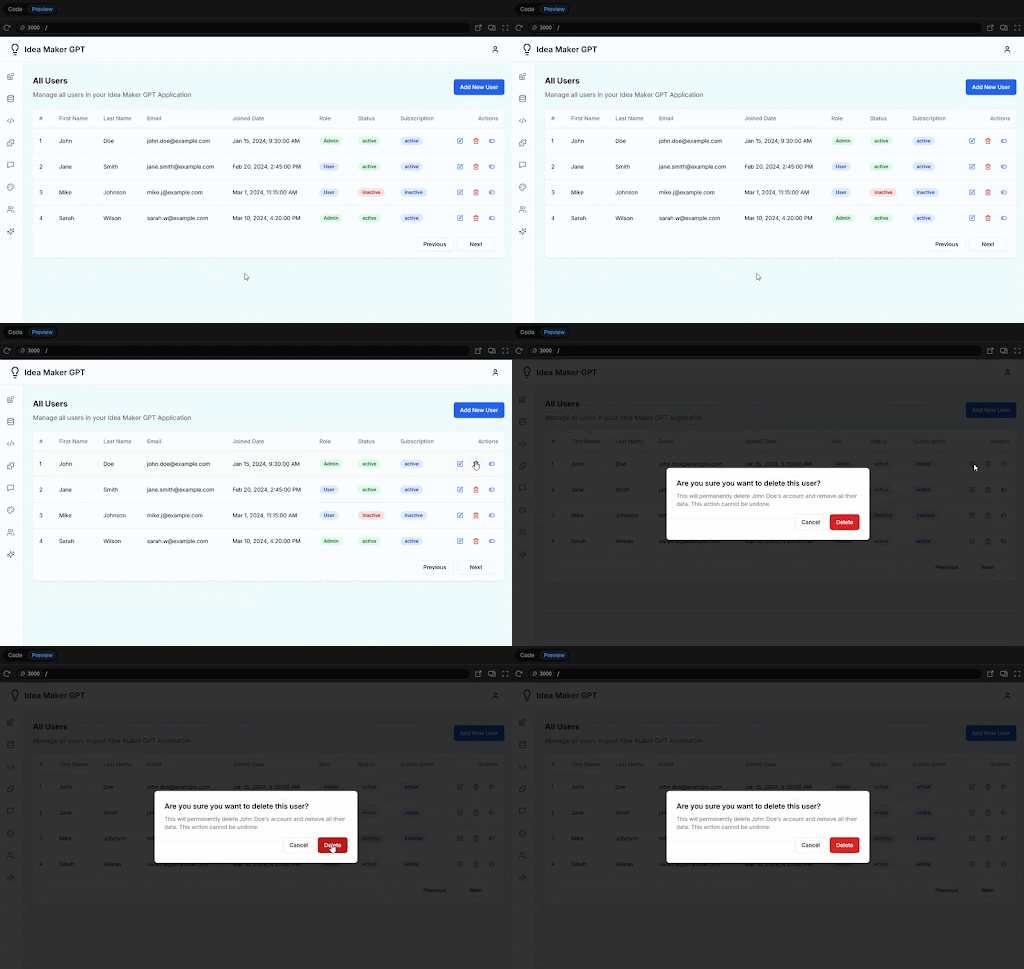
When the Teams in clicked show the following page:
- On the top, have a title “All Users” with a font size of 20.
- Below the title, have a text “Manage all users in your Idea Maker GPT Application” with a lighter color than the title.
- On the right side of the page, which is in front of the title, have a blue button with text “Add New User”.
- Below them, have a table with a following columns: #, First Name, Last Name, Email, Joined Date, Role, Status, Subscription, Status, Actions.
- The Joined Date must show the date and time.
- The Role is represented by User and Admin. The values will be displayed in a badge. The User has a color of light blue, and the Admin has a light green.
- Status is active and inactive. Represent in a badge with a color light green and red.
- Subscription is a badge with a light blue color and have a value of active and inactive.
- Actions has icons with red delete, blue edit, and blue toggle. While hovering, show Delete USer, Edit USer and Toggle status.
- Add a pagination at the bottom Fill the table with a demo data.
This page took a lot more detailed prompting, but it all paid off in the end. Here are the results:
It’s safer to have a ‘confirm delete’ modal to prevent accidentally deleting users. So, we added another prompt:
In the teams, on the delete icon of the Actions, have a confirmation modal when clicked.
Prompt #7: Finalizing The Data Sources Tab
Now, we’re back at the data sources tab. Again, this tab is a bit complicated, so it takes a bit more prompting than usual.
Here are all the prompts we used:
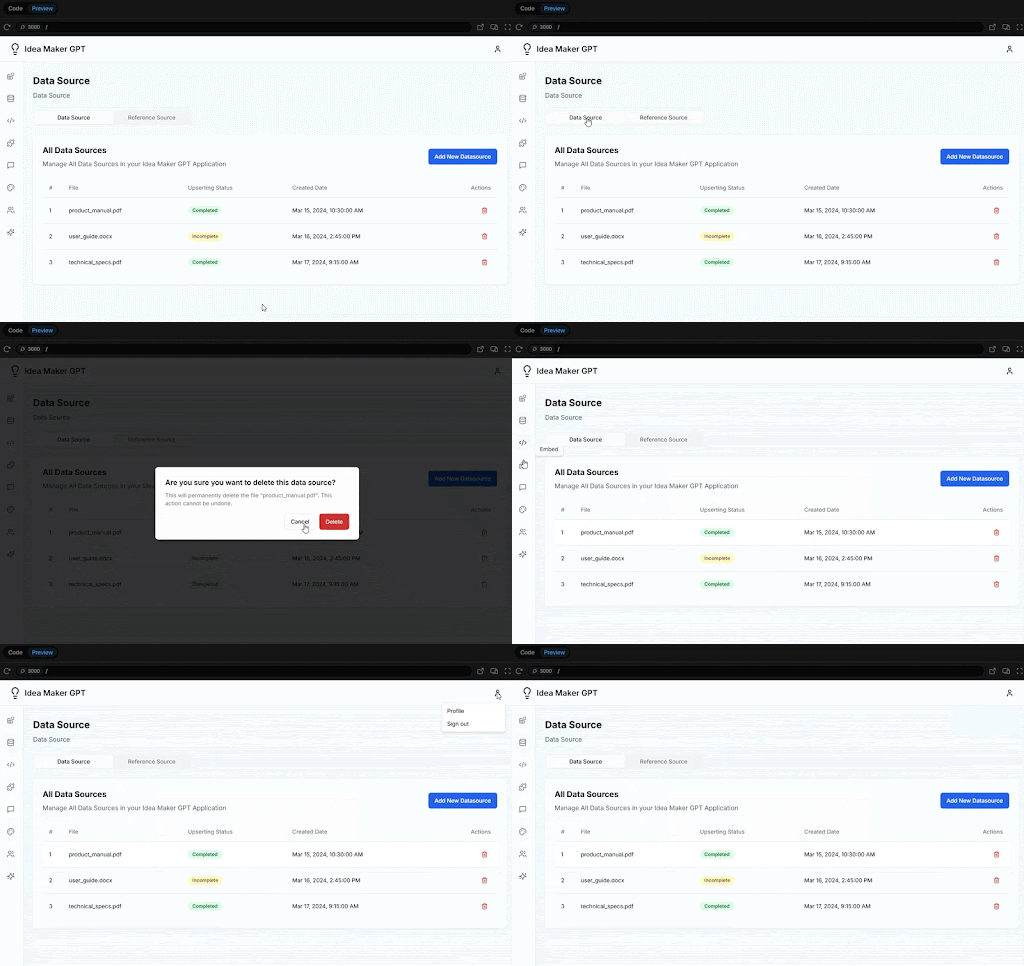
In the Data Source tab, have the title “Data Source” and below it have the text “Data Source” in a light color.
Below the text have the tabs Data Source and Reference Source. The tabs look like buttons. When they are clicked they will show specific content below it.
In the Data Source tab, have the following title ‘All Data Sources’. Below it, have the text ‘Manage All Data Sources in your Idea Maker GPT Application’. To the right side of the page, which is in front of the title, have a blue button “Add New Datasource”. Below the text, show a table with the following columns: #, File, Upserting Status, Created Date, Actions.
Upserting Status has the values of Completed or Incomplete.
Created Date has a date and time.
Action has a delete icon. Have a confirmation modal after it is clicked.
For Reference Source, have title “All Reference Sources”, text “Manage all reference sources in your Idea Maker GPT Application”, button “Add New Reference Source”. Make the style like the previous one. Below it, have a table with the columns: #, File, Created, Date, Actions.
Fill the table with a demo data
Here are the results:
Our Unbiased Thoughts
After all the testing and prompting, we were quite impressed with Bolt’s capabilities. Though it’s normal to run into some glitches and errors, it surpassed our expectations in many ways. Here’s a complete breakdown of our thoughts on AI coding tools and the future of human developers:
Occasional Technical Glitches
We had two cases of fairly serious technical issues that might discourage non-tech users. While I’m sure these will be resolved over time, they can be a potential deterrent to many people. Here are some common problems we ran into during our tests:
- Bolt would run into technical issues on certain occasions and ask permission to fix them. This can be a bit intimidating for non-tech users. We always let it fix the problem on its own. However, in one of the cases, the system couldn’t resolve the problem and ended up with a blank screen. It ran into problems of similar nature on more than one occasion (an issue with the favicon) and couldn’t find a solution, due to which we had to delete the session and start over.
- Restarting with the same prompts didn’t give us the same results every time. While recreating our design, we entered the same initial prompts. Even though this worked previously, it resulted in a failed preview on the second attempt. And nothing we tried could fix it. In the end, we exited the experiment and waited several hours before restarting.
Prompting Can Be Tedious
Writing prompts for coding is time-consuming and a bit tedious. While much faster than doing it manually, describing even mundane things in detail (button, corner radius, drop shadow) can become mind-numbing with time. It’s worth noting that there’s plenty of services that allow you to generate code from images. If there’s an option to choose from a pre-built library in combination with textual prompts, it could greatly speed up things in the future.
Precision Is Limited
Some clients want “pixel-perfect” designs, and can be very specific about shapes, colors, buttons, etc. In such cases, users would need to create more in-depth prompts since the results don’t always accurately match our example. In some cases, we even had to specify the exact fonts, icons and libraries. At that point, we’re starting to get closer to actual coding!
Easy To Use
Prompting to create a webpage is impressively easy. We didn’t need any technical jargon. It was simple; put a button here, make the color blue, etc. It’s definitely something a beginner can do, and the results were quite decent. For MVP, this is definitely a useful tool.
Time Saver
At the end, the experiment was deemed a success. Despite the pitfalls, we were able to generate a high-quality and fully functional frontend in a very short time. Even though the look and style didn’t match our vision, it was a good trade off for the time we saved. For anyone building minimally viable products (MVPs), it’s definitely worth a shot.
Questions
While the test was a success, there’s still a few more items that need to be looked into. Firstly, all we focused on during this experiment was how the site looked. But was the code any good on the backend? We’ve dealt with many sites with poor code before, and it can lead to a ton of problems down the road in terms of speed optimization and manual tweaks.
Secondly, is the code maintainable? Machine-generated code evokes images of spaghetti code with unusual names and procedures.
Did they use modern and well supported libraries? Is it responsive and fast? These are all questions we’ll go over in detail in our next article. Stay tuned for more!
